- JavaScript 82.7%
- CSS 13.4%
- Shell 3.9%
| Filename | Latest commit message | Latest commit date |
|---|---|---|
|
|
||
| .forgejo/workflows | ||
| processing | ||
| site | ||
| workspaces | ||
| .gitignore | ||
| build_all_branches.sh | ||
| README.md | ||


Kasm Workspaces Registry
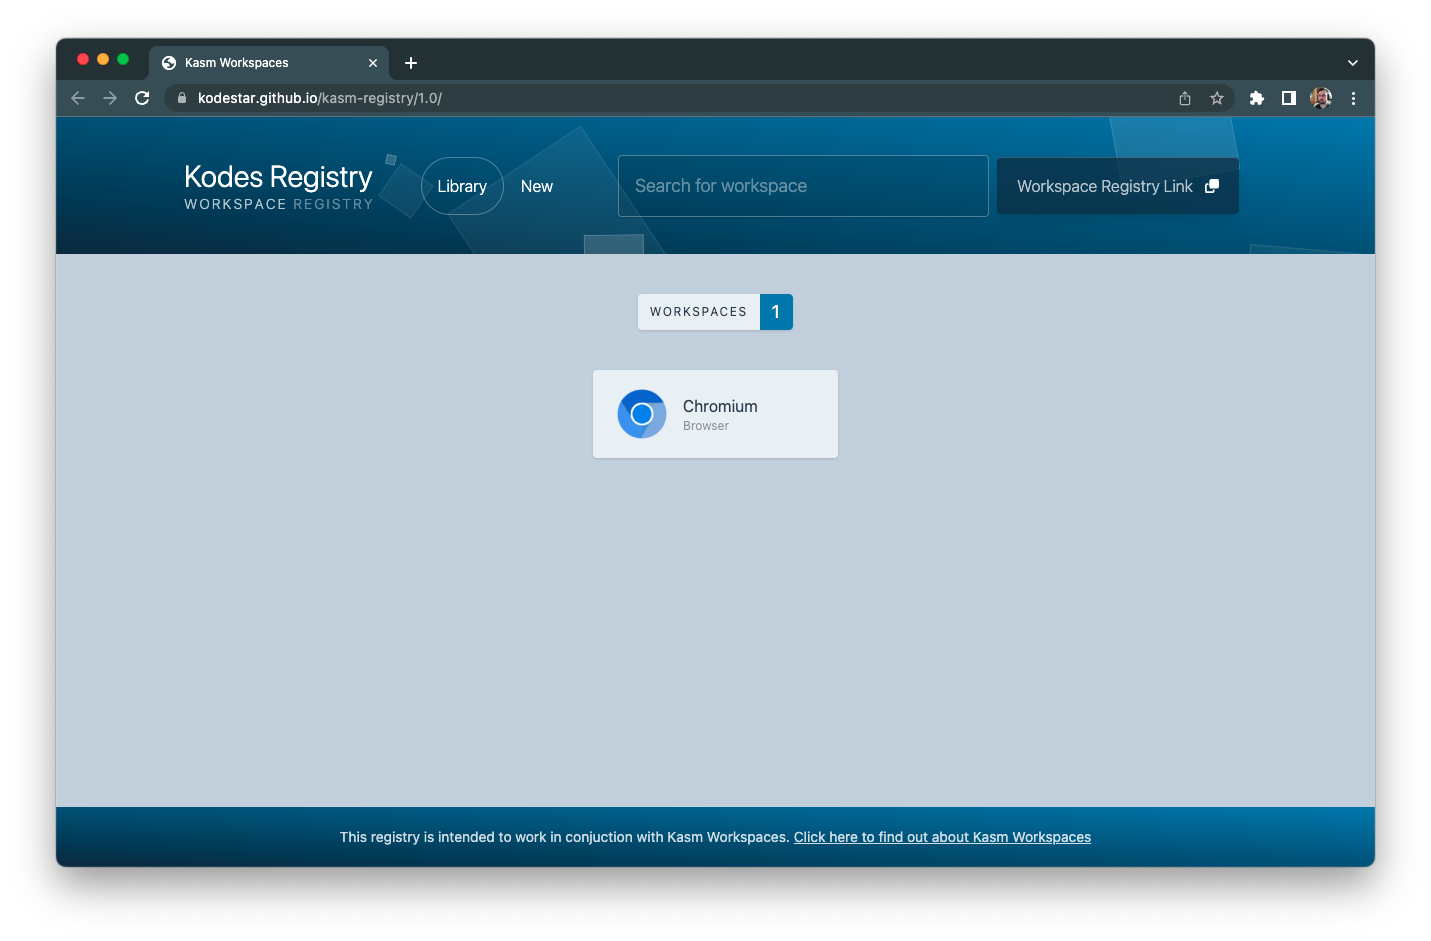
This repository is a template you can use to create your own registry that will work with Kasm Workspaces. A front end website is automatically generated for you and will look similar to the one below.
Contents
- Create your own repository
- Check workflows are running
- Edit the config variables
- Set up Forgejo Pages
- Creating Workspaces
- Discovery
1. Create your own repository
Fork or mirror on Forgejo
- Create a new repository on your Forgejo instance (for example
git.dc8wan.de/dc8wan/kasm-workspaces-registry). - Push this template into it, or import/mirror the upstream repository.
- Make sure the repository is public so Kasm can read the generated registry files.
Configure repository
Note
If you set the Repository name to
kasm-workspaces-registryyou wont have to make any changes to thebaseUrllater, unless you want to use a (sub)domain.
- Select a Repository name, this name will also be used later for the
baseUrl. - Make sure it's set as a Public repository.
- Click on the Create repository button.
2. Check workflows are running
- Open the repository on your Forgejo instance.
- Go to the Actions tab in the top menu.
- Check whether workflows are enabled and a runner is available. If not, enable Forgejo Actions and ensure a runner with the
dockerlabel is registered.
If the workflow list shows the Build workflow, it's ready to run on the next push.
3. Edit the config variables
Modify next.config.js
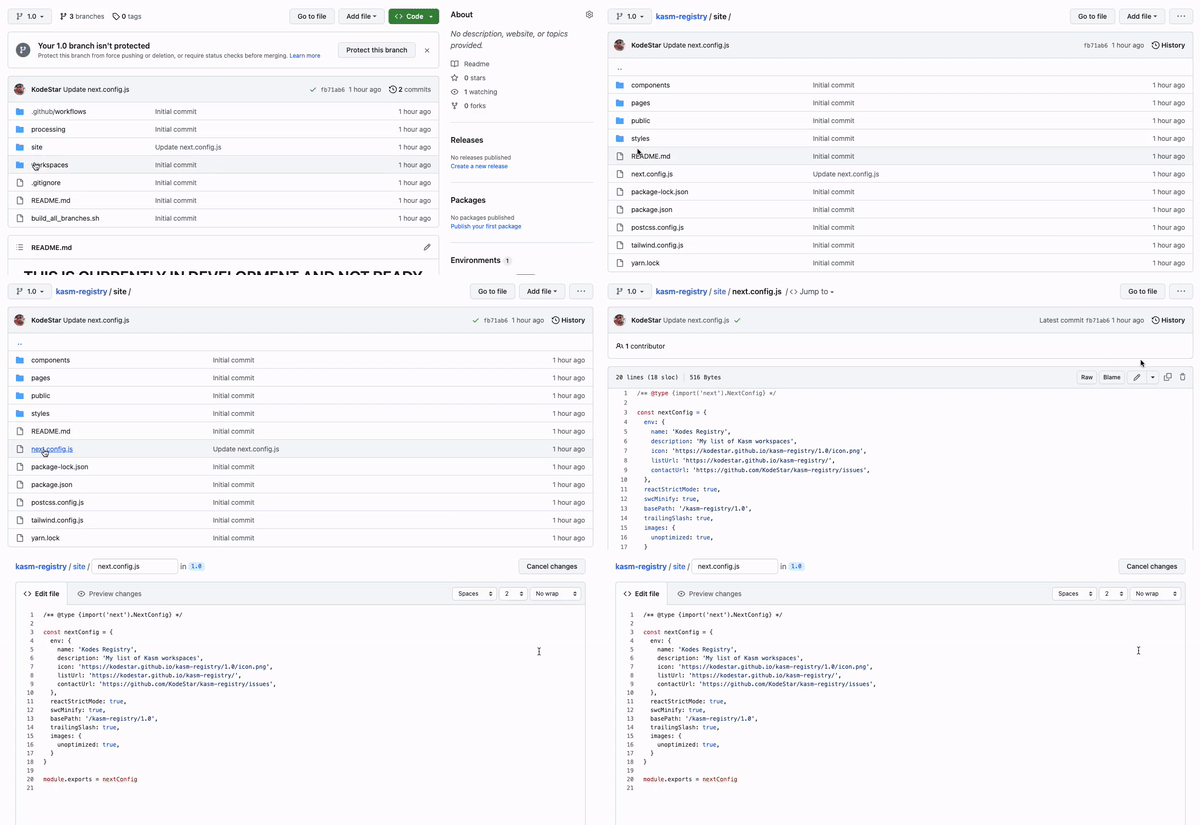
- Go back to the
Codetab - Click the
sitefolder - Click on the
next.config.jsfile - Click the edit button.
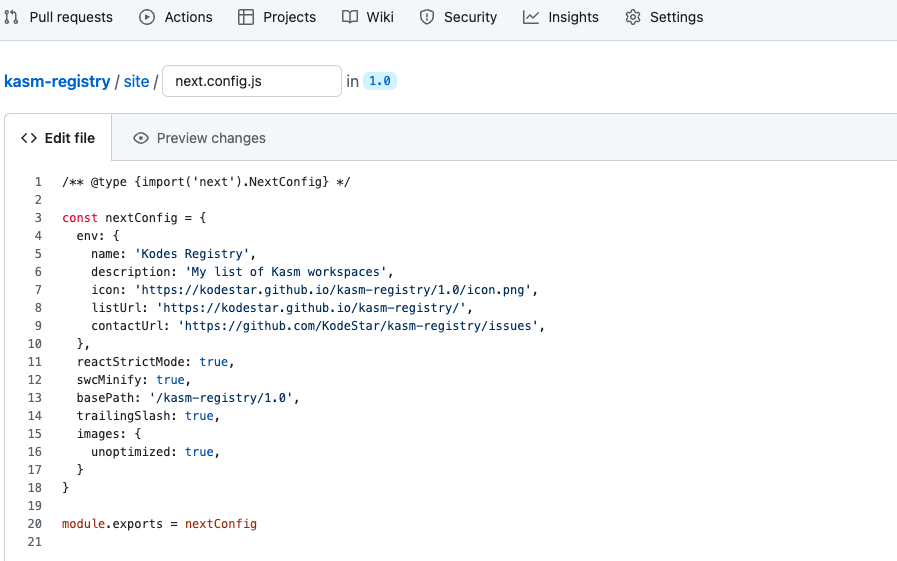
- Fill in the
envsection with the relevant information and change the basePath if needed (details below).
Settings definitions
| Property | Description |
|---|---|
| env.name | The name you want to display for your registry. |
| env.description | A short description to display when a store's information button is pressed. |
| env.icon | The image to display for your registry. You can upload an image to /site/public/ and reference that by https://domain.com/1.0/image.png or if you aren't using a {sub}domain by referencing it from https://username.github.io/repositoryname/1.0/image.png where image.png is the name of the image you uploaded. Alternatively just put the url of an image available on the web. If you just want to get the registry up and working, leave the default value in place until later. |
| env.listUrl | The link to the root of your site. For example https://username.github.io/repositoryname/ it should always include a trailing slash. |
| env.contactUrl | A link users can use to contact you on, such as your github issues page (right click the Issues tab in the top menu - next to the Code tab - and select copy link address and paste that in). |
| basePath | If you are using a domain or a subdomain, your basePath will just be basePath: '/1.0',, otherwise change the value to include what you chose for the repository name in step 2 basePath: '/repositoryname/1.0',. The 1.0 will be replaced with the branch name automatically, so you should always keep it as 1.0. |


Commit changes
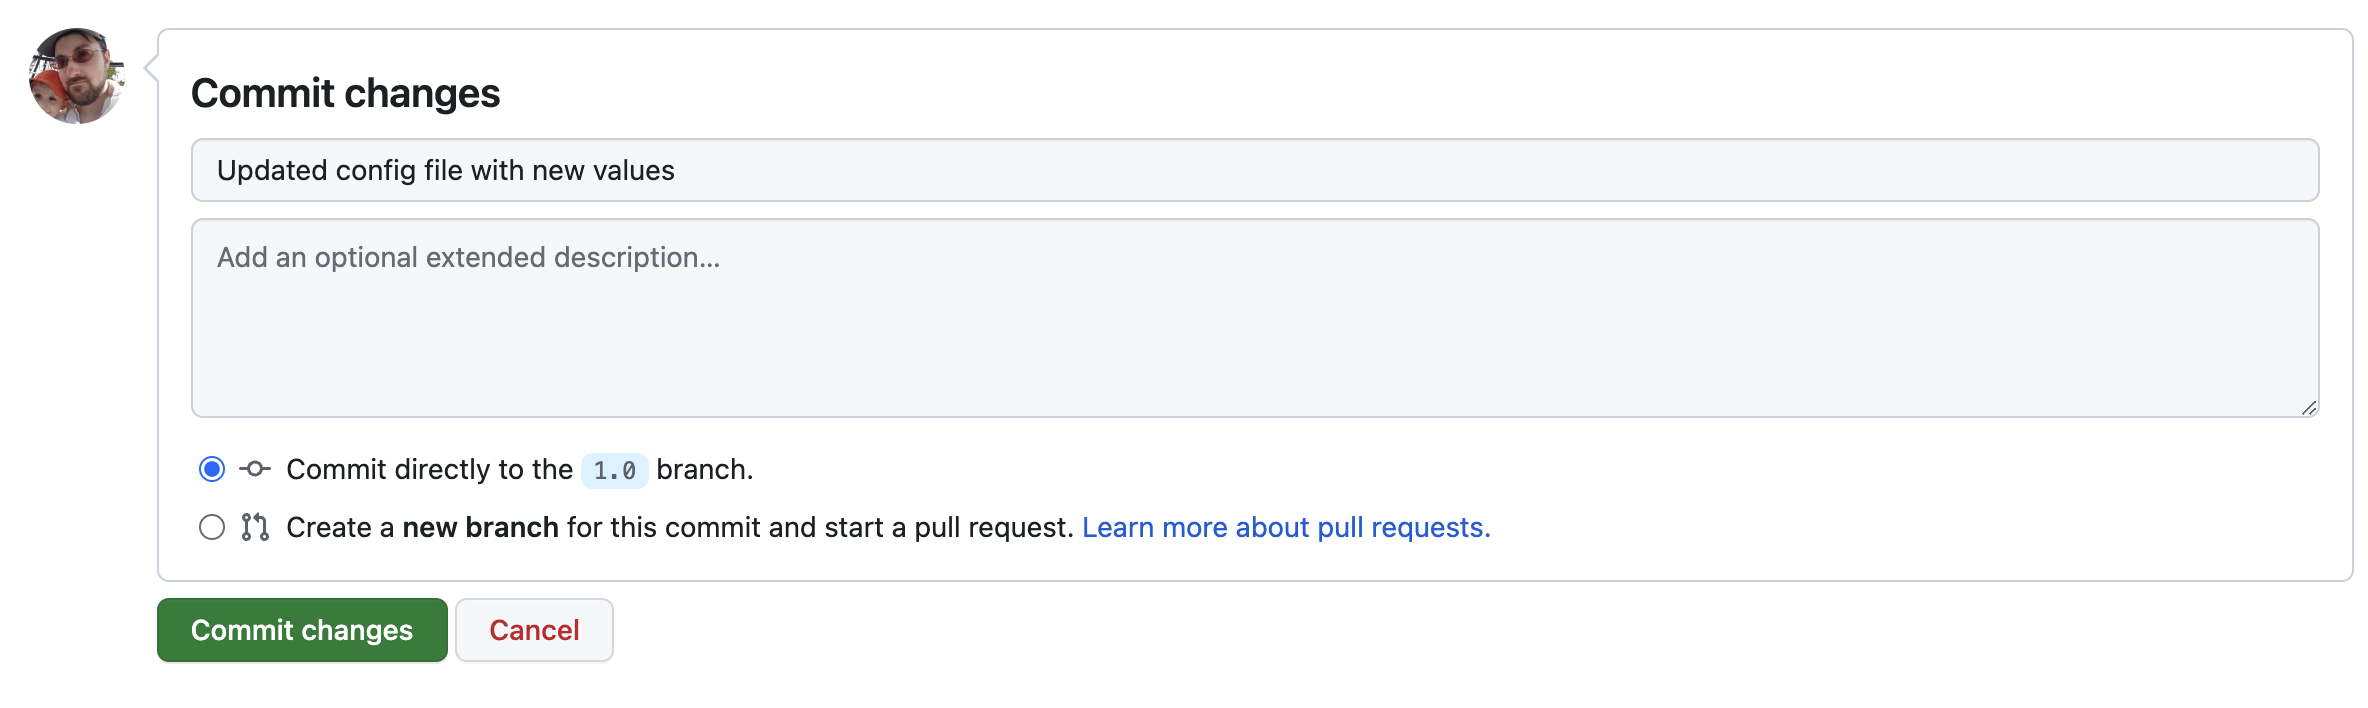
- Scroll down to the bottom of the page
- Enter a commit message (You can also leave this blank)
- Click the Commit changes button.
4. Set up Forgejo Pages
Initial setup
The included workflow builds the registry for every branch except pages/gh-pages and pushes the result to a pages branch. How that branch is served depends on your Forgejo Pages setup:
- Built-in Forgejo Pages: in the repository settings, set Pages to serve from the
pagesbranch. - External static hosting: configure your web server to serve the contents of the
pagesbranch. - Custom domain: point your domain at the Pages output and update
site/next.config.jsaccordingly.
Visit the site
Once the Build workflow finishes, the registry site should be available at the URL configured in your Pages setup (for example https://pages.example.com/dc8wan/kasm-workspaces-registry/1.0/).
Check build progress
Check on the CI progress in the Actions tab. Once the Build workflow is finished, your Pages URL should reflect the changes.
You should now have a working site which includes any workspaces you added or the default if you haven't made any changes yet
Checking it works
Note
If you copy the url from the address bar instead of clicking the button, be sure to remove the branch version from the URL when adding to workspaces, otherwise it wont work.
- Click on the Workspace Registry Link button, this will put the correct url in your clipboard.
- Go to your Kasm Workspaces instance.
- Navigate to the Workspaces Registry (Admin / Workspaces / Click on the Workspaces Registry button).
- Click on Add new in the registries list.
- Paste the URL into the text box and click Add Registry
- Click on the mini icon under the registry name to filter by your registries workspaces
5. Creating workspaces
Once you are ready to upload your workspaces, head back to the Code tab. You can either continue using the online editor or you might find it easier to clone the repository and work on a local copy, it's up to you. For this example we will continue with the online editor.
Folder structure
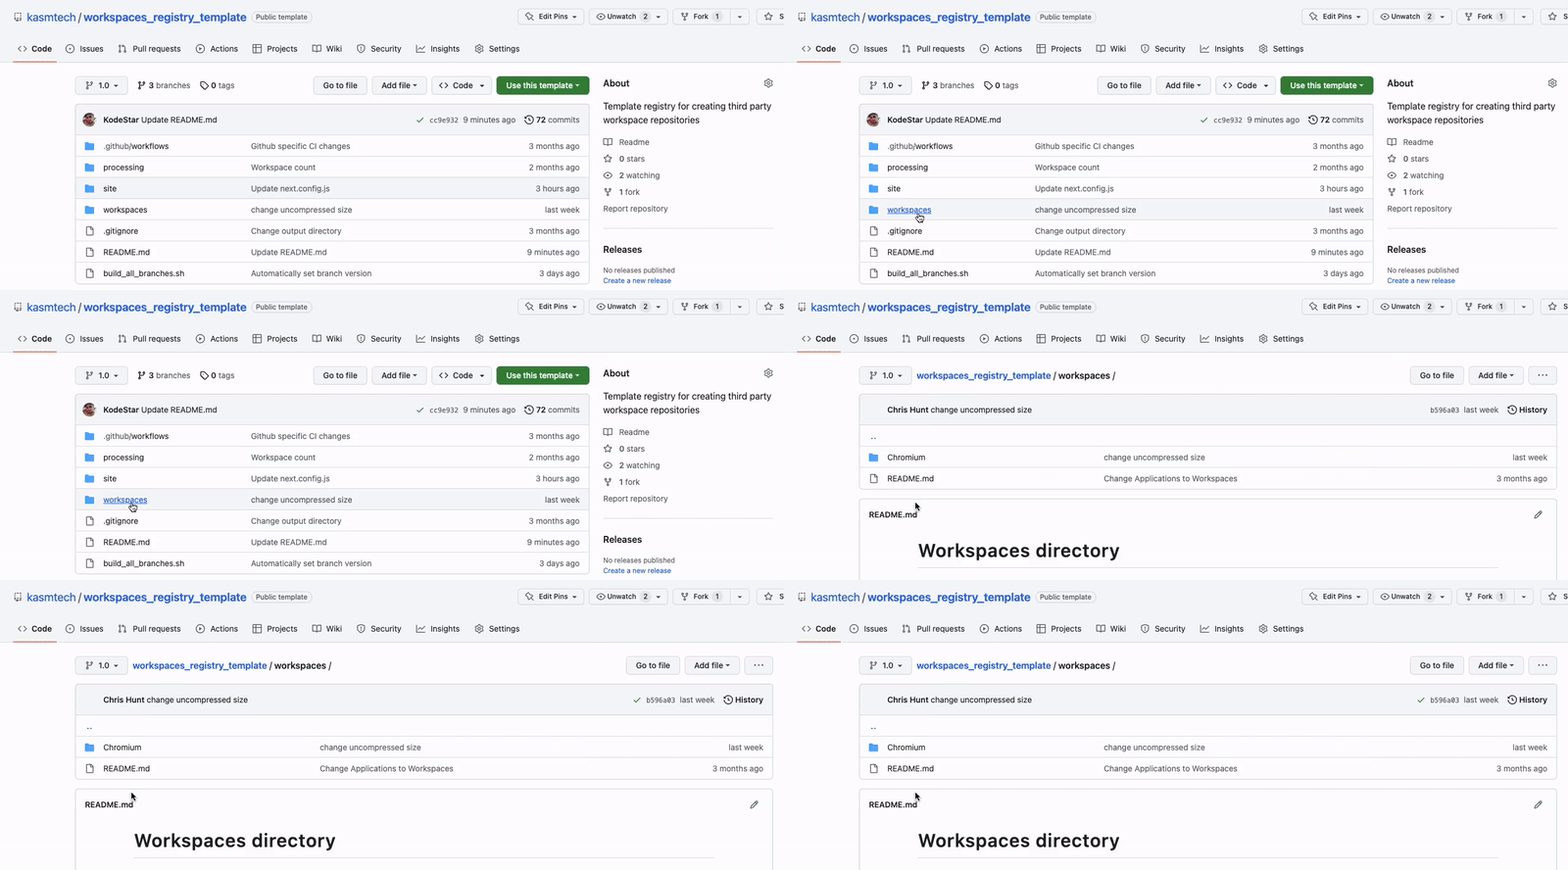
All workspaces reside in the workspaces folder
You will need to create a folder and the necessary files using the following format:
Workspace Name
- workspace.json
- workspace-name.png
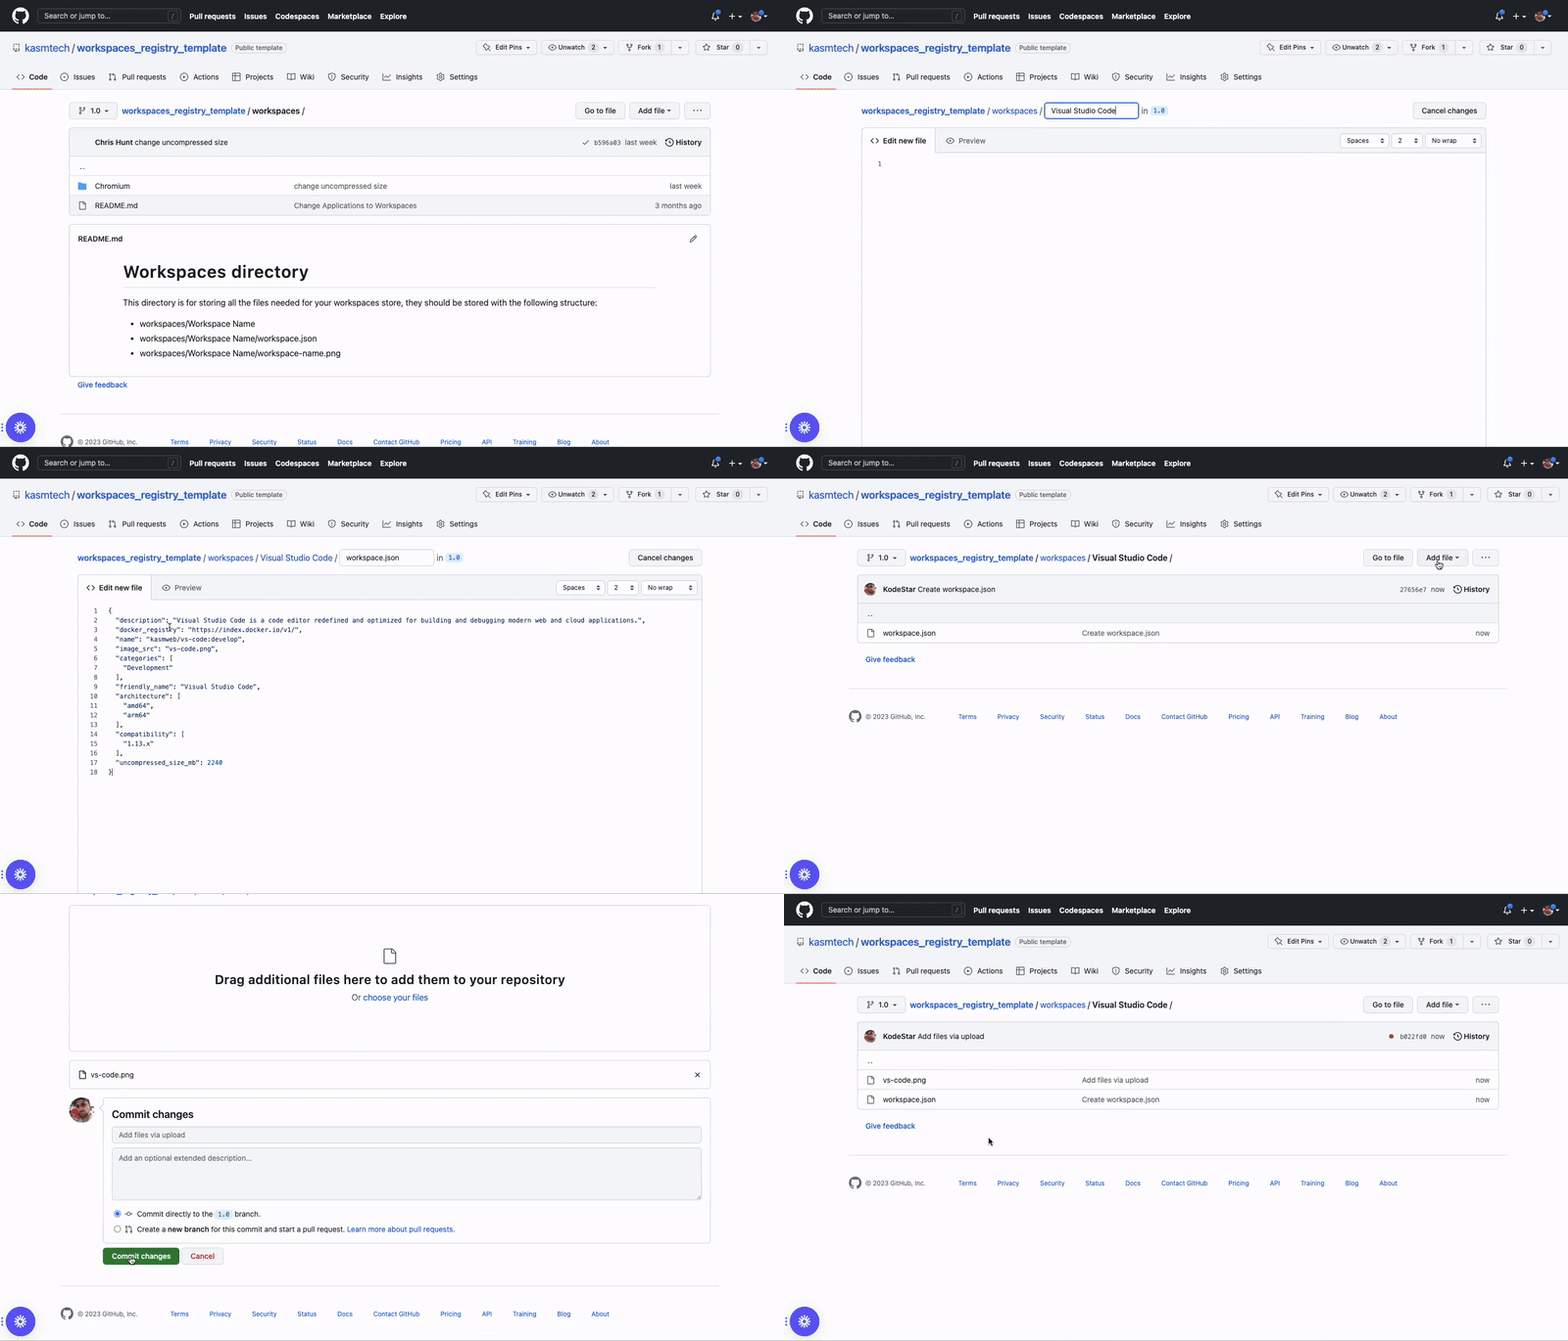
Folder name - The folder name can be whatever it needs to be. You probably want to stay clear of special characters to be on the safe side, but spaces should be fine.
workspace.json - This is a JSON file with all the parameters you want to be sent to Kasm Workspaces when it builds the container. You can see the valid paramaters in the schema section and whether they are required or not.
{
  "description": "Visual Studio Code is a code editor redefined and optimized for building and debugging modern web and cloud applications.",
  "docker_registry": "https://index.docker.io/v1/",
  "name": "kasmweb/vs-code:develop",
  "image_src": "vs-code.png",
  "categories": [
    "Development"
  ],
  "friendly_name": "Visual Studio Code",
  "architecture": [
    "amd64",
    "arm64"
  ],
  "compatibility": [
    "1.13.x"
  ],
  "uncompressed_size_mb": 2170
}
Image file - The image can be .png or .svg and ideally will be square and at least 50 x 50px. If you use the workspace builder on your registry store front it will try to normalise everything to make it simpler.
Don't forget to commit your changes!
Schema
Version 1.0
| Property | Required | Type | Description |
|---|---|---|---|
| friendly_name | True | String | The name to show |
| name | True | String | The docker image to use |
| description | True | String | A short description of the workspace |
| image_src | True | String | The name of the workspace icon used |
| architecture | True | Array | Json list containing either "amd64", "arm64" or both |
| compatability | True | Array | A list of Kasm versions the workspace should work with |
| uncompressed_size_mb | True | Integer | Integer of the approximate size of the workspace when it's uncompressed in MB. This doesn't take into account layers. For example if an image is 2.46GB you would enter 2460 |
| categories | False | Array | Json list containing the categories the workspace belongs too. This should be limited to a max of 3. |
| docker_registry | False | String | Which docker registry to use |
| run_config | False | Object | Any additional parameters to add to the run config |
| exec_config | False | Object | Any additional parameters to add to the exec config |
| notes | False | String | Notes about running the workspace, such as if it requires libseccomp. |
| cores | False | Integer | Specify the amount of cores to use for this workspace |
| memory | False | Integer | Specify the amount of memory to use for this workspace |
| gpu_count | False | Integer | Specify the amount of GPUs to use for this workspace |
| cpu_allocation_method | False | String | What CPU allocation method to use for this workspace. Can be either "Inherit", "Quotas" or "Shares" |
Head to the Actions tab to check your progress and once Page build and deployment is complete, your site should be ready.
New schema version
When a new schema version comes out, you just need to create a new branch that refrlects the new schema, for example 1.1 and make it the default branch.
In the new branch, make any updates that are needed, when the changes are committed a new version will be built.
Kasm Workspaces will automatically pull the version of the schema that it understands.
6. Discovery
If you want others to find your Workspace Registry, add a topic/tag such as kasm-registry in your Forgejo repository settings.
If you are searching for a registry, open the site/next.config.js file and the url can be found under env.listUrl.
KASM-REGISTRY-DISCOVERY-IDENTIFIER